Thursday, October 21, 2010

Gluing on the Top and Discovering an Oops

Pretty exciting day - I hope to complete attaching the top to the rims.

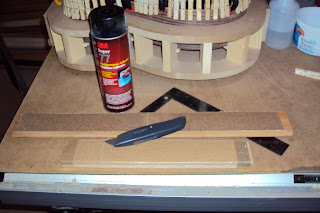
Before I get too far into this step, I don't know if you noticed or not but I changed workbenches. My standard workbench is my table saw with a sheet of 1/2" MDF laid across it. I found, however, as I put in some long sessions that working above the mold so to speak, had me working at a height that became very uncomfortable for my back. I'm guessing but the table saw is around 32" tall and I have it on rollers so I can move it out of the way. The rollers probably add 2". The the mold is sitting on top of that. When I make saw horses the legs are 30" but considering the leg angle they're actually about 28" tall. That 6" makes all the difference in the world. So now I have two saw horses with an old formica kitchen counter clamped across that is about, I don't know, maybe 24" x 30" and it is perfect. I did roll out a piece of that no skid matrix - I don't know the technical name for it - as the formica is a little hard and slippery. You can see the set up in the second picture below as well as the table saw in the background.

The mold is a key player in this step. Ken's direction is to hold the top in place with a couple of rubber bands. This will allow me to tip the mold on edge so I can see what is going on underneath without the top slipping around. Placing a couple of finish nails at the front edge of the top will help it orient length wise before you rubber band. I pre-drilled the top, dropped in the nails, laid the board on the rims and that was when I first noticed this hole in the front where the rims abut. What the heck? I pulled the rim out of the mold. There was nothing poking that would have done this, no sharp edges on the mold, no nails or screw protuberences. All I could think is that while I was shifting the rims up and down in the mold to work on the soudboard or kerfing I must have caught a little sliver in the wood that pulled out more around it as I stressed it. No worries, the neck will cover it but disappointing to have a flaw that I will always know is there.

Now the rubber bands. Nothing fancy. Just looped together two or three cheap bands that come with your mail.Oh, I did have to loctate some screws for the bands to strectch across. I suppose you can do as many as you like. I just did these three feeling two diagonals and one cross was adequate - plus I ran out of rubberbands!!!

Now that I can hold the top on securely I can easily get inside the body to mark where the bracing intersects the rim. The rim and kerf lining will be trimmed out to let the bracing "nest" in the trimmed out area and the sound board will seat flush to the rims.

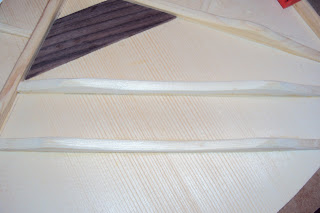
Prior to trimming the rims I sanded down the bracing so that where ever it would contact the rim it was only one popsicle stick tall (about 1/8" I think). This is critical because the binding will have to cover the thickness of the sound board plus the depth of this notch when it is installed.

This began a series of back and forth mark the rim, trim some out, test fit the bacing in the slot, sand down the bracing, mark again, trim again, test fit again. I was going very slowy and cautiously, especially in light of my two latest mishaps. I finally ended up with a nice fit. I was actually pretty pleased with the craftmenship  on a couple and not so pleased on others - par for the course. One slot on the top edge is too long and too deep.I thought I would have to get creatiive but it looks like the binding will cover it well enough.

This one I like:                                                                   These two I don't like:

 Great, the soundboard fits the rims nice and snug. Its time to glue and clamp. Remember the dry fit and test clamp routine. Absolutely critical here. You are gluing the entire soundboard all at once. I don't know about anyone else but as a first time acoustic builder I was very intimidated by this step. There is no return from even the slightest mishap here.

The KMG kit provides a clamping caul for this operation. Its a piece of MDF cut oversize to the shape of the soundboard. You drill a series of holes (pre-marked) around the perimeter and this becomes the clamp as you drive a series of screws through the holes into the mold. As the screws tighten the caul presses the top and rim together. Go slowly  and tighten the screws evenly and you will get a great result. Since I've gotten into this I have read a lot about this step in the process and I am aware that there are several methods to clamp the soundboard to the rim. While this method is extremely simple, it is totally practical. This has a great appeal to me as a New Englander and my appreciation for Yankee thrift (and I'm not talking baseball).

I was so nervous about this step that I went through the dry run process a few times. Snugging the sound board went smoothly and so did attaching the caul but because I was hand tightening the screws I was concerned that it was taking me way too long to finish. I wanted to try to get even pressure more quickly. On the second trial I used a combination of clamps and the screws.


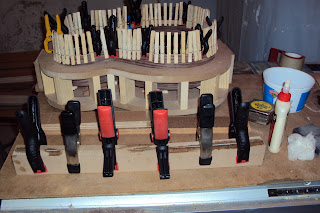
I felt like that worked a lot better for me. Here is the final glue up and clamping.


The glue set overnight and then I used a trim bit in my laminate trimmer to flush the top and rim. I did the recommended clockwise step cuts first but did not take a pic of that.


Still a lot more sanding and clean up to do but this is the interior with the soundboard attached:


I am now up to 35 hours and feeling like quite the slow poke.

Wednesday, October 20, 2010

More on the Top... Learning from My Mistake

With the cross brace installed it was time to shape and fit the two bass bars. The bars came on a single piece of wood with the scallop shape diagramed out. Sorry - I failed to take pictures of this... but this is what they look like when clamped in place. One thing that is hard to tell from the photos is that I saved the curved scallop cuts and was able to use them as cauls when clamping.

Bridge plate, check; cross bracing, check; bass bars, check,. Without going in to a great deal of description the side braces, shoulder brace, another brace I don't know the name of and the sound hole reinforcements are all installed in a similar fashion:


The last step in installing the bracing was to round over all the braces. I don't beleive there is any reason sound wise to do this (probably wrong on that) but it is definitely a craftmanship consideration.


and I'm in for about 30 hours at this point.

Tuesday, October 19, 2010

more on the Top... Preparing the Bracing and a Royal Screw Up

This summary is not available. Please click here to view the post.

Starting on the Top - Install the Rosette

One of the decorative elements to an acoustic guitar is the trim installed around the sound hole called the rosette. Rosettes can come in all sorts of materials, colors and patterns. Some incredibly intricate and some fairly basic. Some are three dimensional and need to be let into the wood and some are stickers that are just applied. I think professional luthiers take great pride in the rosette and really add their personal touch to this element. The KMG kit includes a pre-made rosette and the soundboard has already had the routing completed around the sound hole.

First things first. Make sure you have the right helper:


Just kidding, the cat really likes to sit in cardboard boxes and eat the build instructions. But its nice to have someone to listen when I'm muttering to myself about the work.

Once the rosette is glued to the sound board clamping can be somewhat ackward. Some recommend simply weighing it down - I saw a concrete block used in one example. Ken suggests and I agree that there is a more elegant solution for this.

Start with two pieces of MDF, three carriage bolts and three corresponding wing nuts. The idea is to sandwich the sound board / rosette between the MDF pieces, bolt the MDF together and tighten the bolts to compress the rosette to the wood. I have MDF laying all over the place but no carraige bolts and wing nuts. There was no way I was making a trip to Agent Orange just for this. But I do tend to save everything and this time it paid off. I snooped around my shop area and found some bolts, washers and nuts on an old ski rack I had made to fit in the back of my pick up (back in the day when I owned a truck and skiied, niether of which I do anymore) that would work perfectly. So I pre-drilled the MDF, countersunk one side for the screw heads so it would lie flat and was all set.

I gathered all the usual suspects:


Installing the rosette could not have been simpler. I was anticipating something much more complicated but I had to do very little sanding before I had a nice snug fit. I had a tube of Duco glue which is the preferred glue for wood rosettes - I believe because it holds well and dries clear. I squeezed a few drops, spread it out with a little popsicle stick, dropped in the rosette and clamped it up. I did put a layer of saran wrap between the rosette and the top layer of MDF to make sure any glue squeeze out would not stick to it.


and the finished product:. The gap is ok - it will be covered by the fret board when the neck is installed.

Monday, October 18, 2010

Contouring the Top and Bottom Rim

If you've ever picked up an acoustic guitar you've probably noticed that neither the top or the bottom are perfectly flat - even a flat top guitar is not truly flat (I think). Now that the kerfing has been installed I can contour the edges to accept the contour (dome shape) of the sound board and bottom. The KMG success kit supplies simple solutions for both this contouring and setting the neck angle on top.

For the top you need to create a sanding bar wider than the guitar width - I think I found an oak flooring strip remnant that was 3.5" x 24", cut 80 grit sand paper to size, sprayed some 3M adhesive and stuck the sand paper on.


 The theory is you set the rim in the mold with just a little exposure and then use the sand bar to level it. I had a plane and file ready to use but didn't need them. I had it all level is about ten minutes


Now this is really cool. You loosen the the waist clamp enough to allow you to raise up the front of the guitar to a height equal to eight index cards above the mold. Keep the rest of the body flat to the mold.


Using a second sanding bar that is just wide enough to take down this raised portion, sand until it is flush to the mold. Voila - you have your neck angle set.


The bottom works somewhat similarly but has a much more pronounced contour. You take the two contour sticks provided with the kit, glue them together and apply medium/heavy - I think I used 100 - grit sand paper:


You can see the substantial contour on this.


If you recall - you can sort of see it on the tailblock in this picture - both the head and tail block extend well about the rim height.


These need to be shaved, chiseled, filed, planed down to the rim level using the contour stick as a guide to get the shape correctly - I did not get any pics of this step.

Then take your contour stick and sand down the rim and blocks and kerfing until they blend to the same level. You do need to take care to sand evenly. I found centering the bar over the middle of the mold and twisting back and forth kept it level and even.

Kerfing Time

Kerfing, or kerfed lining, are strips applied to the edge of the rim top and bottom to provide extra gluing surface and reinforcement for attaching the soundboard and bottom. Ken recommends reversing the kerfing - that is the kerf is the glue surface and the flat surface is visible. It is stronger and much cleaner looking but does require an additional step.

 Prior to installing the kerfing you also have to attach some leveling blocks to the master mold to hold the rims in the correct position. I think you'll get the idea from the pictures. The blocks are installed in one position when you're working on the sound board and removed and installed in another position when you are working on the bottom.


The kit provides cedar strips already kerfed (a slice in the wood that goes about half way through). These need to be pre-bent to the shape of the body so they don't break when installed. To reverse bend the kerfing you start by wetting the cedar and then wrapping it in tin foil. Let it sit a few minutes to flex up. Then wrap the strip to the outside of the guitar rim, clamp it tight and let it sit. I did this late one night so it sat overnight. You not only have to clamp it tight but you also have to clamp it continuously along its length, like:


I used every small clamp I owned on just one section of the kerfing. At half a side at a time it would take way too long to complete this step. Also, despite increasing the amount of time the strips were wrapped in foil they were breaking on me. So, I knew that clothespins are a perfectly adequate clamp for this purpose I just hadn't been able to find them over the last week or so. I finally tracked down a couple of packages at Ace hardware. I used the low setting on my heat gun to facilitate the bending process:

and using the clothespins (with regular clamps on some of the more stressful bend areas) I was in business.
Once the kerfing has molded to the guitar shape they are installed inside the rim with some yellow glue and all those clamps.

Once the kerfing has set you install the side reinforcements. Simple straight forward operation. Take a caliper, measure the spacing betweenn the kerf lining, transfer the measurement to the reinforcing strip, cut, glue and clamp. The recommended spacing is 3".


clamped up you get this:

that rosewood looks pretty sweet, doesn't it?


Tuesday, October 12, 2010

Building the Box - the Foundation

10/7 & 10/8 - So now I get to start to truly build. The KMG kit comes with a work board - a sheet of 3/4 MDF shaped like an oversized guitar. The work board and the previously constructed mold are the foundation of the build. First you find the centerline of the work board. Then you align the centerline of the mold with the work board. Set one of the rims in the mold, top (flat) side down, flush to the work board. Use clamps and the waist clamp (provided) to set the rim flush to the mold sides. Locate the right angle of a triangle to align with the centerlines. Mark the ends.


Take a deep breath and trim the rim along your mark. Repeat for the other three rim ends. Set your rims with the butt ends aligned. Attach the neck block and end block per the directions using lots of yellow glue, lots of clamps, the waist clamp and a deck screw through the neck block directly into the mold for alignment and additional clamping power.


Let it set up overnight.


Pedal Power

9/24 - I haven't shown you my pedal board. I'm a hobbyist so its pretty basic Overdrive, EQ, Reverb and Trem. I also put in an A/B switch to keep the tuner out of the loop. I went to Ikea and bought a Gorm shelf and upright and made my own board. I debated different methods of attachment and finally settled on velcro.

So I have the A of the A/B switch going to a Boss TU-3 tuner. There are so many quality tuners out there. I settled on the Boss because its built like a tank, you can see it in sunlight and it can be a power supply if need be.

B goes to a Boss BD-2 Blues Driver. The Blues Driver has a nice warm tube like distortion/overdrive tone but will get nice and crunchy when pushed. I had it for a while before deciding to get the Keeley Phat Mod. I'm still experimenting but the mod is grittier like you're really cranking your amp. The Phat switch gives a beefier, low end sound.

Next in line is a Danelectro Fish & Chips EQ. Dollar for dollar (I paid $15 at a guitar show) this is the best EQ on the market.

I think my favorite effect is reverb, that classic 60's wet echo type sound. Its easy to overdo reverb, a little goes a long way. Really livens things up. The Holy Grail is a natural choice. I liked it in the store and I really like the deal I got on eBay on a used one. The Spring setting at 11:00 works just fine.

Last in the line is a Danelectro Tuna Melt Tremolo. For me its special use only - think the opening riff to Gimme Shelter, or almost any CCR or Blvd of Broken Dreams by Green Day.


For power I bought a Power Pad II. What I liked most about the power pad: no 60 cycle hum, courtesy AC jack (so I can use the power jack that came with the Holy Grail), 8 x 9V outlets. I did not add a power strip for now.

Saturday, October 9, 2010

The kit (box 2) arrives

9/23 - Oh happy day - I've been patiently waiting for this.


Just like box 1 it is very well packed:


Sides, neck, fret board, kerfing, binding, purflings:


Top, back and rosette. Like the color and grain on the rosewood. The top is Edelmann Spruce and is pretty non-descript - the lightest color spruce I've seen. Don't know if you can tell from the picture but the bracing is already laid out on the top.


Bracing, bridge, headplate cover, rim reinforcements:


Neck, fret board, neck block, fret wire, tuning pegs: