Wednesday, November 17, 2010

and now its on to the Fingerboard

For me there is a real sense of satisfaction with the box closed in. Its sort of like with my electrics when you have all the electronics wired and closed in and the knobs and switches are in place. But there is still a lot of work to be done. My next step is to start on the fretboard. Some guitars have a solid neck fretboard included. Some guitars have a fretboard made out a different material from the rest of the neck. My favorite electrics have a one piece maple neck. I have two with Rosewood fret boards laminated on to one piece maple and I don't like them so much. The back of the neck - the maple part - is fine but for me the fret board is slow, not that I have fast hands, its subtle but I can feel it. My acoustic, however has a laminated rosewood fret board and I love it. Almost all fretboards have some curve to them. My electrics have the tightest radius you can get, 7.25. I have small hands and that works for me. My acoustic is much flatter, 12 I think. which is good for flat picking and fingerpicking. So this build has a laminated ebony fretboard with a 12 radius.

The first step is to install the fret wire on the fret board. First I re-jiggered my workstation a little. For this part of the build you need a solid surface to nail on so there is no deflection or bounce when you hit it with a hammer. I simply turned my sawhorses 90 degrees so I would be nailing directly on to the cross piece of the horse. I also got out every tool I thought I might need - framing hammer, tack hammer and a cheepo that I got at a flea market for $2 this summer that has a plastic head and a hard rubber head. I was thinking about nailing frets when I boiught it. I also got out lineman pliers, wire cutters and wire nips not knowing what would work best to cut the wire. And I got a stool that would allow me to sit up high over the work so I could really whack down with the hammer. Here's  my set up:


and a closer view of the tools.


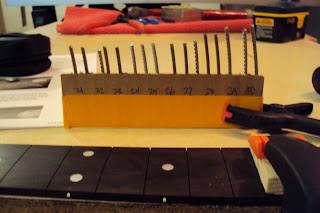
Since Ken's kit provides you with a pre-shaped, pre-slotted fret board, step one for me was to cut the fret wire into workable lengths. You want to cut the wire longer than the slots but I needed to be careful as I had a fixed lenght of wire and had to make sure I left enough for every slot. To keep track of the wires I set them into a length of corrugate that is taped on the bottom and held verticle with a small clamp. You may notice on the picture that the slots are numbered. I cam up with this idea when I was wiring effects pedals and needed to keep track of the resistors. As I sort through them they get slotted into the corrugate slot that correspondes to the reisistor number on the ICD. But back to the frets...


I got everything clamped up good and tight and started wailing. I started with the cheepo hammer using the solid plastic head and it worked so well I never changed. After two or three I got the technique down and it went really quickly;


a closer look with the frets hammered in:

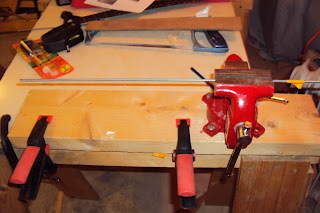
Next step secure the frets and cut them to length. I started to make a clamping caul that Ken suggests. You take two 1/8" threaded rods. Cut them to length


and epoxy them to a scrap of wood (MDF, whatever) that is the same size as the fret board. Hey, look, I found another use for the clothespins. 

to be continued


Saturday, November 13, 2010

On to the Top

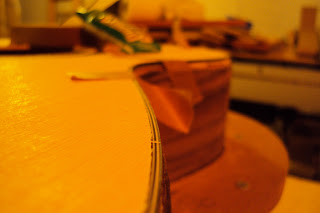
I mentioned in an earlier post when I started routing channels for the bindings I spaced on routing for the purfling on the top before routing for the binding. I didn't know if doing this out of sequence would present complications or not. I was about to find out. Routing the channel for the purfling required the same tool and jig setup as routing for bindings and the same need for adjustments for depth and gap. Trial and error was in full play and after several attempts with minor tweaks I was set. Two laps around the top produced this. Hard to make it out but there is a small channel within the larger channel.


You  might be a able to see it a little better in this picture:

If I do the set up and installation correctly I should end up with this look:


I decided to stay with Duco but switched from the sticky green tape to the Stew Mac binding tape. My dry fit:


The installation went without incident:

and then I was ready for the bindings. A test fit, some cleanup and scraping followed by another test fit.


And another installation without incident. I can't believe it. Except for scraping and sanding the box is finished

Thursday, November 11, 2010

The other side, scarf joints and oh crap.


Now that I have the application technique the other half went quickly. I did leave a glue gap where the two binding strips meet at both ends because I needed to trim off the overlap and make the joint as seemless as possible. The recommended joint for this is called a scarf joint because if done correctly it leaves the least visible line. I have done lots of mitre joints and lots of butt joints but never a scarf joint but how hard can it be? 

Well, its not hard at all but if you lose concentration you just might catch your blade (I was using a mat knife) on the center strip and pull a chunk out like I did. I am in denial, I can believe I did this. Crap, another flaw, but maybe with patience and a little craft I can make it fairly invisible.


I pulled the chunk out and continued fitting and cleaning up the joints, again not difficult but a lot of trial and error to create a nice tight joint. Here we are with the scarf joint completed at both ends and the damaged center strip repaired.


Here's a close up of the repair job. Its still wet from wiping off the glue in this picture but I'm hopeful that when it dries and I sand and fill a little it will look ok.


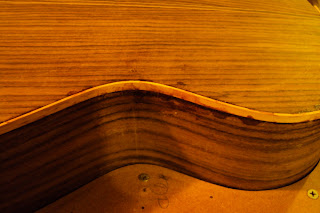
And while I've only done a token amount of scraping and clean up I think this will look nice when its finished:


This is the last step for the back until clean up and finish. Next I install the purfling and binding on the top and then I can actually start working on the neck

Enough already, attach the frickin binding

So let's get cracking. I debated a few different ways to do this. I finally settled on taping the binding in place and releasing short sections, gluing and retaping as I moved along. Here it is with one side taped in place.


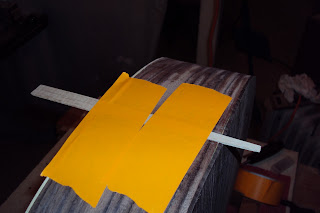
A common comment from the various how to's I've seen is to have tons of tape strips ready for quick application. So with the entire side taped in place and several extra strips at the ready it was go time.


I started at the neck block gluing and taping. Here you can see I've released the binding from the tape to give me room to apply some glue. Then I would retape, pulling very tight to make sure I had good contact and then move to the next 8" - 10".


Here's another angle of the same shot. From this point on it was glue and tape, glue and tape. I stopped taking pictures because I was trying to work quickly before I had problems with the glue setting up before I was ready.

I worked my way around the one side and then let the glue set overnight. I just didn't have time to do more. This is the result.

And you can see I have a  lot of tidying up to do, especially around the waist area where I got messier than I like. One of the reasons the Duco glue was the right choice is that this will clean right up with a good sharp metal scraper.

All in all not bad but I still have a lot more to do.

Wednesday, November 10, 2010

Choosing the Correct Materials

After all the prep I'm finally ready for some installation. There are two key materials you need to decide on. One is to choose an adhesive to attach the binding the guitar. There are a few considerations. You need a superior bond of binding to guitar.You need to have adequate work time so you can finesse and anchor the binding to the guitar before the glue sets up. You have different glues that work better or worse depending on your binding material - you might want to use a different glue to attach wood to wood than you would to attach plastic to wood or pearloid to wood. I did quite a bit of reading and frankly became more confused the more I read. It seemed there were pros and cons for every choice. For every recommendation there was a warning from someone else. I had regular Elmers carpenter glue, Titebond original formula, Super Glue, Duco and Gorilla Epoxy to choose from.


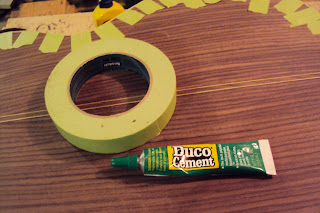
You also have to decide what adhesive tape you are going to use to hold the binding in place until the glue sets up. You want something strong enough that you can really crank down and pull the tape tight. You want something that will not stretch too much. You want something that sticks well but isn't so sticky it pulls slivers (or worse) of wood when you remove it - especially on the soft soundboard. I had regular masking tape, painters masking tape, super sticky green painters tape and binding tape from Stew Mac.


I dropped Ken from KMG a note to get some advise. He explained his method of using CA glue and why he uses it. For a builder with his experience level it made a lot of sense. But for a rookie builder with no experience he had a different recommendation which also made a lot of sense. The winners are:


and of course I needed some protection:


Tuesday, November 2, 2010

Its Binding Prep and Backstrip Time

If you recall from one of my earliest posts part of the KMG kit is a jig for your router base that allows you to rout binding channels plumb to the sides even though the top and/or bottom are radiussed. Now I have an opportunity to find out how well this works. Fitting the bindings is trial and error. You have to practice on scrap. Because the jig uses only a bit and does not use a bearing to fix the depth you are setting both the depth and the height. You can take initial estimates using the binding to get you close and then its fine tuning from there.I think tool quality plays a role here. My laminate trimmer is on the frugal (borderline crappy) side and has a cheap plastic bit height adjustment. Very difficult to fine tune and difficult to snug down so it doesn't move.It is plenty powerful enough but a tool with a superior adjustment mechanism would be a plus.

In hindsight the fit trial and error was a bit of a blessing as it also allowed me practice time. By the time I has the correct fit I could handle the trimmer/jig easily, holding and controlling the jig and just keeping a little pressure on the router base. I learned that you cannot hold the router in the traditional manner and "drag" it along the rim - you have to hold the jig and steer it along. Once I got the hang of it it worked like a charm. And I got a really good fit. I did the top...


... and then flipped it over to do the bottom. As I started setting up for the back I remembered the purfling. I had totally spaced on it. Oops, should I have trimmed for the purfling before the binding? Hope not because its too late now. I decided to continue with the back since the set up would be the same.By now I was quite the expert and the bottom went quickly.


Once completed I had to consider a back strip. This is decorative - it hides the line created when the two halves are jointed. Sometimes the joint is so clean and the grain is so attractive you want to celebrate it not hide it. But I thought in this case a back strip would be kind of nice and since I am a new builder I wanted to have the experience. There are a lot to choose from. I found a nice selection at Luthiers Mercantile and saw one that was rosewood with two basswood strips. I thought the bass wood would be a good tie in to the maple bindings and the rosewood would be a good match to the guitar body. So $4.50 later I had back strip. Now, how to install. I taped the strip in place and marked the location with a sharp pencil:


Now, how to create the channel? I could route it with my dremel but I would have had to make several passes with those tiny bits and the height adjustment looked too imprecise. I could rout it with my laminate trimmer but it was still set up with the binding jig and I didn't want to take that off ( lazy, I know). I could use my router but I didn't really have the correct bit and had no desire to go to Agent Orange to pick one up. So I put a new blade in my mat knife, stuck a metal straight edge down with double sided tape and started cutting. When I thhought I had gone down far enough I set the straight edge on the other layout line and repeated the process. When I had the channel well defined I went to town with a 1/4" chisel. It was just a hair narrower than the strip. That was perfect. I could chisel the meat out and use a sanding stick on the sides and bottom to fine tune. Here's the result of the first couple of passes with the chisel.


I can honestly say that it worked out great and I got a great fit for the strip. Of course I didn't take any pictures of the completed channel but here's the glue up. Same clamping caul that I used on the back reinforcement a couple of days ago.


After removing the clamps and a lot of sanding:


I swiped it with a little Naptha to see what a some wet will do for it. Should be really pretty with a finish.


Installing the End Graft

The end graft helps hide the seam created where the two rims join in the back of the guitar. Ken provided a piece of maple for this, the same maple as the bindings. If I do it right it will be a nice constrast to the rosewood.

Stabilizing the body for this step was a challenge. I saw where a few builders had used a ladder back chair or some more elaborate extension of their work bench. I spotted these 2x4s that I had just brought down to the basement after using them for supports for window air conditioners and thought hmmm? Just maybe they can make a base wide enough to support the box. I placed some card board strips between the box and the 2x4s clamped it up and voila, a perfect work set up - well, it was a little too high but I wasn't about to complain.


So I cut the angles in the maple, laid it out on the box, used a metal straight edge and a new blade on my box cutter and went to town. Easy to do. I used a chisel and cut the slot a little tight. This allowed me to file perfectly straight lines for the final fit. It came out nice:


and the final glue up


and the finished product (albeit upside down):